Thứ Tư, 26 tháng 7, 2017

Youtube daily report Jul 27 2017

Hello Fast Scholars! My name is Ashanti Hands and I'm your Vice-President

for student services and although I'm out of the country I would not miss the

opportunity to be a part of your official welcome to our amazing campus.

We understand that as foster youth, you have a unique lived experience, and as

such, we want to create the spaces and places that allow you to receive the

support that you need, access to resources that you need, and constant

reminders that you are exactly where you need to be, that you matter that, we care,

and that you are more than capable of being a successful college student. We

cannot wait to partner with you as you pursue your academic, career, and personal

goals. There is a saying I love. It says the two most important days of a

person's life are one, the day they were born

and two, the day they figure out why. We are excited because at Mesa College,

we get to partner with students in special ways to help them understand

their purpose, their reason for being. Many of you will find that purpose in

the classroom through specific majors. Some of you will find it through

advocacy or leadership opportunities or in community with other clubs and

students on campus in our organizations. Some of you will find it through

internships, some may find it studying abroad. Whatever it is or wherever it is,

we are committed to helping you find your purpose to pursue your goals to

successfully transfer and then to help push and challenge you to create an

established bigger dreams. You are a part of a great institution but what makes

Mesa great are students like you, and the valuable contributions that you

bring and the only way we'll be able to know you better, to understand what it is

that you need, and to help you pursue your dreams is if we do this together in

partnership. You are surrounded by a team of faculty staff, students, and

administrators who are here to help you, to support you, to grow with you, and to

be better because of you, so please use us on your best day and your most

challenging day. We are here and committed to you throughout this entire

process. We understand that there are many places that you could be but we

thank you for being here with us today. We thank you for choosing Mesa and we

look forward to serving with you and and watching you grow. Thank you for being

here. I hope to see you during Welcome Week and beyond. Again welcome to Mesa

College!

For more infomation >> Fast Scholars Greeting - Duration: 2:38.

-------------------------------------------

불금에 먹는 종류별 감자칩! MISS VICKY'S POTATO CHIPS - Duration: 5:56.

Hello! it's Claire.

Hey guys. It's Venita.

Our Love…

I went to Costco a couple of days ago.

I found this variety pack of chips.

Luxury packaging.

I tried some of them and it's freakin delicious.

Regularly, American chips are very salty to me.

It is true. Our chips are very very salty.

I love this chips because it's not that much salt.

I think it's maybe half amount of salt.

She used…

Total= 32 Bags

I like Sea Salt & Vinegar flavor because it's sour

but the problem is I ate all 6 bags.

I'm very sorry! I apologize.

I did not know we were going to film.

Once I open the bags......

(Claire singing 'I Luv It' by PSY)

I couldn't stop…

Let's try.

Let's do it.

We definitely need soda for this!

Today we're taking it to the next level with snacking.

Play, Sleep, Eating...Play, Sleep, Eating.

There's nothin like chips and soda.

It looks like this inside.

That has a good crunch.

Ya! CrUnCh CrUnCh.

It's not salty at all. Right?

I prefer this over other potato chips.

Crunchy, has great texture, and not salty at all.

It's more flavorful than salty.

Also, I like the package size.

Now we're moving onto…

Smell that?

Spicy smell.

We're gonna try Jalapenyoooooo…

Ooooh! different color.

Jalapeno chips is a little bit orange and yellowish.

I'm In Love ♪

♫ LAAAAHHHHHVE ♪ ♫

It has a gourmet taste.

When you try other chips your nostrils burn by the fake jalapeno powder.

But, Miss Vickie's Potato Chips just

came into my ♥heart♥.

This is my favorite.

Spicy with a little kick.

What do you think about Korean singer PSY's music video?

He's the best!

He's super creative.

Funny.

It just sounds good.

Sorry again for eating all of the Sea Salt & Vinegar chips.

I will describe the taste to you.

If you eat other companies chips,

it's just freakin really sour.

But, Miss Vickie's chips is tastefully sour and delicious.

Its king of the CrUnCh CrUnCh.

This is the fun part.

I know.

I wish you guys were here to eat with us.

Ohhhh...different color again.

Hey Guys! That was the BBQ, which is really orange.

This is jalapeno and sea salt.

I'm gonna be honest with you .

Talk to me.

In general, I don't like BBQ chips at all

because it's too strong for me.

DUDEEEE!!! I was just going to say that.

(Venita singing 'I Luv It' by PSY)

BUT...the flavor of these chips are never overly seasoned.

Hits my expectation.

I don't know what it is.

Thank you Miss Vickie!

Miss Vickie you're awesome.

Your an amazing person.

Anytime I go to the chip section and someone ask, "What type of chips you want?"

They point at the BBQ and I say, "NO"!

NO NO NO We Ain't Gettin BBQ.

This is actually very tasty.

Yes.

This color is so nice and bright.

Usually the other chips are dark (Not Vibrant)

It's like poop!

Ya, I don't want to eat that.

But, Miss Vickie's chips are pretty.

It's not salty, it's flavorful.

Just the perfect amount.

Hipster potato chips.

If you want to see what we're talking about go to Costco to try it right now.

That was our review on Miss Vickie's Potato Chips.

If you ever want us to review other American chips please write a comment below.

Then I will get back to you.

You're the best Miss Vickie!

You're the best!

Make some more of these chips girl. Maybe add some more flavors, but if not I'm cool with this too.

Onion flavor.

Cheddar Cheese.

Ya Miss Vickie (You feel me?)

Bye Guys!

See you next time.

Comment.

Comment below.

For more infomation >> 불금에 먹는 종류별 감자칩! MISS VICKY'S POTATO CHIPS - Duration: 5:56.

-------------------------------------------

'택시' 안현수 직접 밝힌 러시아 귀화 "한국에서 입단 방해 있었다" | 연예뉴스 24/7 - Duration: 4:43.

For more infomation >> '택시' 안현수 직접 밝힌 러시아 귀화 "한국에서 입단 방해 있었다" | 연예뉴스 24/7 - Duration: 4:43.

-------------------------------------------

After showdowns over police chases, Chief Flynn says he feels under fire - Duration: 1:08.

For more infomation >> After showdowns over police chases, Chief Flynn says he feels under fire - Duration: 1:08.

-------------------------------------------

Franken Trump firing Sessions would be a constitutional crisis MSNBC - Duration: 7:22.

For more infomation >> Franken Trump firing Sessions would be a constitutional crisis MSNBC - Duration: 7:22.

-------------------------------------------

How NOT To Paint A Telescope - Duration: 15:16.

hey YouTube today I want to talk to you

about the LX 50 deforking and

modernization restoration project I've

decided to take on in the last video I

went ahead and deforked my telescope and

said that I was going to put some

dovetails on here in preparing to do the

dovetails I had to remove a set of

screws from the telescope here and here

and some of these screws were so rough

that they had siezed to the tube and I

had to drill them out to avoid getting

filings into the telescope that would

scratch up my optics I had remove the

optics so I went ahead and did that

pulled the screws out with the drill and a

tap and decided since I'm this far let's

go ahead and repaint and flock the

inside so I set out to do the paint job

I stripped all the paint off I primed it

with primer gray hit it with a flat

black because that I'm supposed to use

for this color shifting blue that we

decided to go with and it turned out

looking like shit as you can tell it's

kind of scuffed up it's a little hazy

there's a slight color shift to it and

the biggest annoyance of it all are

these black lines these black lines are

where none of the color shifting paint

stuck to the black primer and the reason

why it wasn't going to stick was even

though I tried to spray at the coldest

part of the day it was still 85 degrees

and the paint dried between the can and

the tube and I had to spray from just a

few inches away to get anything to stick

and that didn't give me a broad coat

uh a broad spray and it was incredibly narrow

so I ended up with these uneven spray

lines and I did my best to minimize them

but as you can see they're still there

and it just doesn't look right so what

I'm going to do is admit defeat I

don't know what I'm doing and I'm going

to take this any get it done

professionally and I'm hoping it's going

to turn out really cool what I did do

however and I

as well is I got a lot of video of how I

went from the original Meade blue to this

point and so what I want to do is show

those of you who are thinking about

taking our project like this but haven't

done it before what it took to get to

this point and I'm sure 90% of you 95%

of you out there have better paint skills

than I do I'm terrible at it

if you can do better paint jobs than I

can then I'm sure that you'll be able to

do a telescope that just looks beautiful

I suck my paint job sucks my telescope

looks like crap so why don't I show you

how I went from the Meade original blue

down to the bare metal and then built it

back up with the primer the black base

coat and in the color shifting paint and

what it took me to get to this stage

first off I needed to remove the paint

from the telescope tube to do this

I used a pretty strong paint remover

what I didn't realize when I was using

this at first is that in direct sunlight

on a black telescope or dark blue

telescope like my Meade is the spirits

inside of the paint stripper actually

boil away which you can see going on

right here now I did my best to kind of

spread it around so it could work at the

time I didn't realize I was kind of

defeating myself the more I spread it

around the faster that the volatile

chemicals inside of the paint thinner

would evaporate and the less time it was

actually effectively able to work and as

I began to try and scour it down through

the paint it just peeled off kind of

like a rubber cement or rubber

would and none of the paint ever

actually came off so after I got wise to

what was happening to the Sun I moved

into my garage and allowed the telescope

to kind of cool down before I tried

again this time I waited and saw that

the paint never actually boiled away so

I was able to spread it around over a

larger area and get it to react with the

paint a little bit unfortunately it was

not very reactive to this kind of paint

and it took an awful lot of scrubbing

just to get a little bit to flake off

but eventually I was able to get down to

some bare metal all in all it's taken me

about an hour just to get to this point

but I was about to have a little bit of

a breakthrough it turns out that this

paint really wasn't paint at all this

telescope had been powder coated and my

paint stripper did soften it up enough

to where I could get under and peel it

off and it peeled away almost like a

latex balloon or heat shrink wrap that

was shrank over the telescope tube so I

set about running paint thinner all over

the telescope tube letting it sit for

about 10 minutes and then peel away what

I could and this went on for about three

hours once I had to paint removed

I needed to fill the original screw

holes leftover from the deforking

process I used automotive body filler to

do this and an index card just to kinda

scrape it smooth with the surface once

filled I then went ahead and grabbed

some 100 grit sandpaper and attempted to

sand down all the remaining specks of

paint that the paint remover could not

get off

there were about a dozen or so spots all

over the tube and some of them were a

bitch to stand down I ended up actually

having to stand them flush with the

metal rather than just sand them off which

is what I was kind of hoping to do the

majority of the spots that I would had

to work on were around the rim now I'm

doing some priming on the optical tube

primer was needed for the paint that I

was going to put on as it was not a

primer and first coat all in one so I

opted for a sandable gray primer that I

could spray all over the tube to kind of

fill in some of the scratches that were

left over for my sanding of the paint

flecks also I was hoping it could kind

of fill in any of the unevenness from

the body filler I put in to the two

screw hole next I needed a better way to

paint putting it on a lazy susan just

wasn't working

I decided I could create a horizontal

roller by using a couple of wheels

screwed into two-by-fours like this I

picked these up at the Home Depot they

were only about 2 bucks each

I used leftover decking screws from when

I built the observatory deck to secure

these to a few spare two-by-fours

leftover also from other construction

projects we've had around the house with

the roller assembly done I was able to

mount the telescope tube to the rollers

and it worked out pretty well once I

actually got the wheels onto the black

metal part and not the piece that I was

trying to paint I could just roll it

around like this and I was able to then

paint left to right instead up and

down after doing a second priming I went

ahead

sanded it down to get rid of any orange

peel in the primer this is it after I

was done sanding for some reason the

video did not record when I was trying

to do the sanding so you can see what it

took it's glossy because it's still wet

from the wet sanding after I had

everything wet sanded and dried I went

ahead and removed the old plastic

masking that I had taped on it was

beginning to peel away from all the

moisture that was in there

and it was becoming a problem and I was

afraid that's a black paint and the

color shift paint would eventually get

into the places I didn't want it to so I

swapped out the old masking for some new

masking after the old masking was

removed I put on a pair of latex gloves

and wash them off to make sure there

wasn't any oil on them and then I went

ahead and used a few drops of dish soap

and warm soapy water to spray down the

optical tube and get any remaining dust

and finger oils left over from the

previous sanding I didn't want any of

this stuff to contaminate the black

paint job that I was about to put on

once I wiped it down with a towel to

kind of dry off any of the soapy water I

then hit it with just regular hose tap

water to get any remaining soapy residue

off the tube again I didn't want to need

that soapy residue to interfere with the

next color of black just to make sure it

dried fast and not to allow any moisture

to soak into the primer I went ahead and

towled it off with a few shop towels just

to make sure that the moisture would

stay on there then I moved it out to an

area where I can get a little bit better

visibility my garage was a little dark

and opted for the deck of my observatory

to re mask the optical tube now it was

about 9:30 or 10 o'clock in the morning

and it was already hot you can see sweat

dripping down my arm from in type to

those latex gloves there's also a bit

windy although on a hot Texas summer day

the wind is more like a hair dryer it

doesn't really do anything to make it

more comfortable it's a major hindrance

and it kept blowing this new masking

paper I was trying out everywhere and it

was a real bitch to get taped to the

optical tube but eventually I was able

to get a grip with the new tape and

secure it to the optical tube and tape

around this frog tape I have it

actually does not stick very well to the

Scotch blue painters tape nor does it

want to tear very easily if you're doing

this with latex gloves like I am doing

and you're already using some other form

of painters tape stick with whatever

painters tape you've got don't try this

frog tape it doesn't like it so what the

back of the optical tube assembly taped

up it's time to tape the front of the

tube and this time I got a little wise

and decided to just roll the tube along

the deck and allow the wind to maybe

push the paper into the telescope

instead of trying to blow it off of the

telescope this seemed to work a little

bit better

it took me about 20 minutes to tape the

top of the telescope tube this part only

took me about five minutes to do with

the masking all taped off I went ahead

and got the new black base coat applied

I was using a color shift paint from

rust-oleum and the color shift paint from

rust-oleum requires that I use a black

base coat I opted to go with a

semi-gloss based codes hoping that the

semi-gloss would allow for a better

color shift the rust-oleum did say that

I could just use black primer which is

it really gloss at all but I figured if

it's going to shine through to the black

and then be reflected off of that

a semi-gloss would give a more dramatic

effect I applied probably two or three

coats of the black paint it's kind of

hard to tell exactly how many coats I

put on because I would rotate the

telescope around sometimes two or three

times during a single coat and I was

going so light I don't know if it

actually counted as the single coat or

maybe two coats in one application

however for this last application I was

going for a little bit more of the gloss

coat and so I did spray it on a little

thicker and I took my time applying it

making it a little more wet and I

sprayed it on and I do think that this

really did help give it a good black

color with this final coat of black

paint added I then allowed it to dry

overnight and then I quickly sanded it

down just to remove any of the dry

overspray that had cured to the tube

biggest problem I had when applying the

color shift paint with how fast it dried

I was running into a few compounding

issues one was the paint would dry so

fast it wouldn't actually even adhere to

the telescope it would dry in midair the

second problem was that dry overspray

would land back on the tube as I was

spraying and get caught in anything that

was still wet the result was a milky

appearance of anything that did stick

and dried to the tube and I do believe

that this was a contributing factor

among my own stupidity and mistakes that

led to the black stripes being all over

the telescope also the white milky

looking appearance was the result of

tiny air bubbles trapped in the paint

and it dried I did my best to stand them

out and clean the tube up the best I

could

the reason the telescope looks so shiny

and actually has that purple color shift

here is because I had already been

sanding it for about three hours

it started at 320 grit sandpaper and

sanded for about an hour or two and then

eventually worked my way to 400 and

ultimately 600 grit sandpaper trying to

smooth this out eventually I had had

enough

and decided to call this telescope

project a lost cause with the help of a

local powder coater I'm going to be able

to get the color shift that I want by

using professional help I hope you have

enjoyed my little journey and if you've

liked what I've done here or any of the

other videos I've done please go ahead

and subscribe to my channel and give

this video a like as always clear skies

and keep looking up

For more infomation >> How NOT To Paint A Telescope - Duration: 15:16.

-------------------------------------------

[ENGSUB] SEVENTEEN - GOING SEVENTEEN EP 06 - Duration: 6:29.

[GOING SVT TIME!] HS : Guys, this is "GOING SEVENTEEN".

HS : We're about to leave now.

HS : We're going to our fan signing events in Daegu and Daejeon!

HS : Shall we go now? 1, 2, 3! Go! Go! Go!

DN : Our fan signing event is only 10 minutes away now.

DK : Less than 5 minutes. DN : Yes, less than 5 minutes.

[Taking their time to show off their outfits] DN : Please check out our outfits.

DN : This is our "Don't Wanna Cry" outfit.

[Dino's favorite color, Serenity] DN : I love this color.

DN : I love the color.

DN : What do you think, Vernon? VN : It's pretty.

[It's SEVENTEEN's official color, Serenity] VN : It's our color, Serenity. - DN : Serenity.

DK : Serenity & white. Where's Rose Quartz?

VN : Rose Quartz is right here.

[Time to meet the fans in Daegu] DN : We're now off to the fan signing event.

DN : Since this is "GOING SEVENTEEN". DK : Shall we say, "GOING, fan signing event?"

JS : GOING! SVT : Fan signing event!

[Photo op before the event]

[Time for photo op by unit] SC : Unit, don't you have any good idea?

T8 : Let's pair up based on if we have double eyelids or not .

[Team 1, No double eyelid unit]

SC : This is what they call "Transience of life (pun)".

[Coup's lame joke got the audience stirred up]

[Full of confidence, as Daegu is his hometown] DK : Full of confidence. - SC : I'm full of confidence now.

SC : This is my zone.

[Team 2, hidden double eyelid unit] SC : Next up. - DK : Hidden double eyelid.

[(Still lame joke)] SC : That's a bummer (pun).

HS : It might be hard to see your hidden eyelid, so please open it so they can see it.

[(Can you see my hidden double eyelid?)]

[Team 3, double eyelids unit] DK : So handsome.

[The largest number of members] HS : Double eyelids. Show your sparkling eyes. 1, 2, 3!

HS : How pretty.

[SEVENTEEN's Daegu fan signing event starts] HS : Let's start the event!

[Mingyu's self camera ON] MG : We're now at

[Don't block my face] MG : our Daegu fan signing event.

JS : Yo! Mingyu! MG : Yo! Joshua!

[2 syllable poem by the master of syllable poems] JS : Yo! A syllable poem with Daegu. Let's go!

MG : 1, 2, 3. Dae. JS : Don't be so obvious.

[Shua's 2 syllable poem with Daegu! How would it end?]

[(Extraordinary kills of the master)] MG : Gu! - JS : So pathetic.

[2 syllable poem, The8's turn] JS : The8, let's go! 2 syllable poem with Daegu. - MG : Syllable poem.

T8 : How do I make a 2 syllable poem with Daegu?

MG : 1, 2, 3. Dae! Make a big hit!

[A CARAT fan catches SEBONG's attention]

[All eyes are on him]

[The youngest fan appears in SEVENTEEN's fan signing event]

[I'm here to meet SEVENTEEN] SK : For the first time in 2 years. - JH : The youngest.

[(Laughter)] [(Pleased)] SK : Are you shy?

[The youngest fan stole Seungkwan's heart] SK : Hi, baby. Are you a baby? - F : I'm 6. - SK : You're 6.

[(A complete fabrication)] WW : Seungkwan is picking a fight with a baby.

[Surprised] SK : I didn't pick a fight.

WW : Are you a baby?

[Boo Seungkwan/Charged of asking if he's a baby] SK : Are you a baby?

[Wonwoo flower has bloomed] SK : Wonwoo!

[Wonwoo looks adorable today] SK : Wonwoo is a baby.

[Having a great time with CARAT in Daegu]

[CARATs know SEBONG's tastes so well]

[(Silly Wonwoo)]

[I love you, CARATs]

SC : We're SEVENTEEN. 3, 4! SEVENTEEN!

[Wrapping up the event on a high note] SVT : Thank you. Bye.

DK : We're here for our 2nd fan signing event. MG : In Daejeon.

["In Daejeon" came to interrupt Dokyeom] DK : Following the Daegu event, we came to Daejeon.

[Self response] DK : Clap your hands! Good. - MG : In Daejeon.

[Catchy "In Daejeon"] DK : In Daejeon. I have tickling in my ear.

MG : In Daejeon.

DK : How many minutes before the event? MG : In Daejeon.

DK : Can't you say anything else? MG : In 5 minutes.

[Dokyeom made him to say another word] DK : He said, "In 5 minutes". - MG : In Daejeon.

[Now even Dokyeom says In Daejeon!] DK : I feel so... - MG : In Daejeon.

[Greeting the fans in Daejeon] Let's start the event now!

[Seriously cute heart brothers]

[Angel in white, Joshua]

[The visual that brings peace of mind]

[SEVENTEEN grows with CARAT's love]

[DJ Wonwoo's music show]

[1st song : Stigma / Yim Jae Beom]

[Wonwoo's sweet voice (a.k.a eardrum boyfriend)]

[2nd song : I can't / 4Men]

[Singing vibrato, touching CARATs' hearts]

[3rd song : A Goose's Dream / Insooni]

[Wonwoo's singing makes Vernon sing along]

[Wonwoo has been writing something]

[What did he write?]

WW : It's my go-to songs that popped into my mind.

[We'll look forward to your medley of favorite songs!]

[Woozi is excited to meet CARATs]

[Handed over a mic to have real fun with it]

[The master doesn't care about instruments]

[He can make a song anywhere with his fingers]

HS : I'm the prince of SEVENTEEN...

DN : OK, Hoshi, don't go too far.

[Bangchan's great skill of cutting in] DN : We finished our fan signing event. - HS : Right.

[Here comes The8] HS : Hi, The8!

[Here comes Joshua, too!]

[Shua is humming] HS : Joshua!

[Shua is all the more hyper today]

DN : I think we are really cheerful.

[Cheerful members' excitement]

T8 : Now our fan signing event outside of Seoul ended.

DN : There's a lot of events and stages we're preparing for.

DN : Please look forward to it.

DN : I'm not sure when "GOING SEVENTEEN" will be aired, but I hope you'll enjoy it.

[Ggoing Ggoing is back] DN : Our behind-the-scenes stories. You know?

DN : Our behind-the-scenes, how have you been? HS : Ggoing Ggoing.

DN : Hoshi's behind-the-scenes story is Ggoing Ggoing.

[Contagious Ggoing Ggoing] HS : Ggoing Ggoing.

HS : We're Hoshi, Dino, The8, Josh at the fan signing event.

SVT : Thank you! GOING SEVENTEEN!

For more infomation >> [ENGSUB] SEVENTEEN - GOING SEVENTEEN EP 06 - Duration: 6:29.

-------------------------------------------

[한글자막]홍색기구4 - Duration: 12:21.

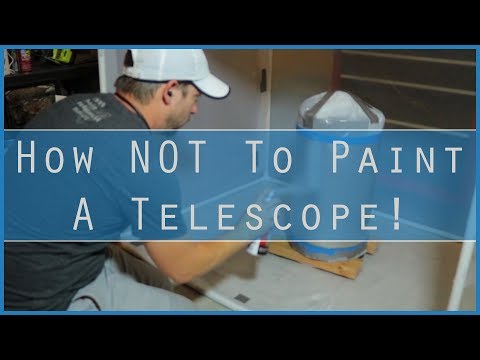
For more infomation >> [한글자막]홍색기구4 - Duration: 12:21.

-------------------------------------------

Autoboy Blackbox : Dashcam App - 25/07/2017 15:30:30 - Duration: 7:25.

For more infomation >> Autoboy Blackbox : Dashcam App - 25/07/2017 15:30:30 - Duration: 7:25.

-------------------------------------------

COD WW2 FREE BETA WEEKEND!! - Duration: 3:24.

Yo what is going on guys it is your boy Yogge here and today I have another

call of duty world war 2 video for you guys today so this goes out for the

people that are waiting for the beta or want to see if there is going to be a

free weekend like there was for infinite warfare and black ops 3 basically I got

all the answers today alright so to start off at least I just want to say

yes there is going to be a free weekend beta I'll tell you guys the dates later

but first there was a really popular question for some reason a lot of people

are asking are you going to be able to use all of the 5 divisions in World War

2 and the answer is yes so if you don't know what the divisions are I'll put

them on the screen here there's an armoured division the division

specializes and laying down basically like an LMG division class whatever you

want to call it then we have the mountain division you guys can be dead

as well basically this like the sniper type of classes then we have the

infantry division as all rounded combat specialist the imagery decision the

level of ellebra you can read all that expeditionary division one with a hardy

supply of explosive and tactical equipment that fighters can specialize

and you know you guys can read that as well if we have the Airborne Division

this maneuverable division is usually the first as a fighter you know

parachuting you stuff like that and this is the also the division we

have the little suppressor I still have a question about the divisions I don't

know if like you're going to be able to use for example the mountain look like

that AR or something because does remain undetected and that sounds like ghosts

so you know I don't want to be using the infantry division I mean infantry is

like it says basically you rarely miss your shot so I'm guessing you have like

toughness or something in that class but still like I don't know how it's really

going to work because what if you want to have ghosts but then you can't have

ghosts of using air that's going to be pretty dumb but anyways to get onto the

main point and the main reason why you guys are here is the date of the beta so

the first weekend on ps4 only starts on August 25th through the 28th starts at

10 a.m. and ends on 28th at 10 a.m. Pacific time and then we have a second

weekend which is ps4 and Xbox one September 1st at 10:00 a.m. Pacific time

and it ends on September 4th at 10:00 a.m. Pacific time so I'm not sure if

xbox one is going to have a free weekend maybe the second week will be their free

weekend maybe like you know going to do with destiny did were like

the first the second day it was you know paid but then you know the last two days

were free but basically ps4 the first weekend it'll be like to the people who

bought the digital edition and then the second weekend will be four you know

people on ps4 that haven't had it you can play for free for four days so first

weekend you have to you have to preorder a second weekend you can download it for

free so i guys i guess that's basically that's all i really wanted to talk about

to you guys today that divisions all five of them are confirm you can play

all of them when the beta does come out you can try out all of the divisions all

the weapons maybe not all the weapons but most of the weapons i'm guessing

where guys hope you guys enjoyed this video if you guys did enjoy mentions

even my cute individuals i don't mind i stay healthy and uh yeah i'll see you

guys on the next one may not sit we don't want to end up like my friend

spots on a big project when is it give me in charlotte and you'll make it to

the food that they will run it down but it and even it always posting on the

ground

For more infomation >> COD WW2 FREE BETA WEEKEND!! - Duration: 3:24.

-------------------------------------------

Toyota Yaris 1.3 5drs Business | Navi - Duration: 0:57.

For more infomation >> Toyota Yaris 1.3 5drs Business | Navi - Duration: 0:57.

-------------------------------------------

CNN 10 - July 27, 2017 | Construction and conservation concerns in Costa Rica - Duration: 10:01.

For more infomation >> CNN 10 - July 27, 2017 | Construction and conservation concerns in Costa Rica - Duration: 10:01.

-------------------------------------------

Top 10 Psychological Thrillers That Will Blow Your Mind - Duration: 6:47.

10 Psychological Thrillers That Will Blow Your Mind (PART I)

#10- The Uninvited

The Uninvited is an American remake of a Korean Horror movie. You might have heard that the Koreans and Japanese make the best horror movies.

Emily Browning's acting makes a person to recoil in the opening minutes. Her acting is ideal for a horror movie.

She plays an innocent girl who returns from a psychiatric clinic. She is troubled by nightmares and is convinced that her real mother was deliberately burnt to death by her father's girlfriend who is all false friendliness behind the sunshine.

The story is not as predictable as it may seem though.

#9- FlightPlan

It is more like a claustrophobic thriller where a worried mother awakes aboard a huge passenger jet, while taking her husband's corpse for his funeral, to find that her little daughter is missing.

How can a girl disappear from an airplane at 37,000 feet? It is a frightening thriller where the killer cannot enter or leave- but is the girl killed? Is she even on board or her mother has just lost her mind? The movie will stay with you for a while raising some questions in your mind even if you finish watching it.

#8- The Machinist

The Machinist is the story of Trevor Reznik (Christian Bale) who weighs just 121 pounds and his looks will make you flinch.

Bale lost more than 60 pounds to play this role and that is what will make you dissolve in his performance and worry for his life. He plays a lonely insomniac who is dejected at work.

There are two women in the world who are kind to him, they are not related to him though. An underweight sleepless man who finds himself trapped in the vise of world's madness.

#7- Shutter Island

This movie starts to play on us even before it starts- the opening music is as gloomy and doomy as the movie itself.

Starring Leonardo DiCaprio and Mark Ruffalo, it is haunted island movie as the name suggests, shutter island is an isolated craggy island off Boston which is adapted as a prison for the criminally insane.

The two leads visit it as U.S Marshals while the dread encompasses the viewer.

#6- Mulholland Drive

If you like a movie that makes sense, do not watch this movie. But again, this entire list is based on the unpredictable so why not this.

This movie will make you get lost in a journey where you will find yourself. It will grab you and wont let go until it's done with you. It is a deeply unsettling movie through a subconscious city of night.

#5- Donnie Darko

Starring Jake Gyllenhaal as a disenchanted but an extraordinary teenager, this movie provides a moving and slightly mind bending journey through suburban America. After surviving an accident, Donnie explores what is it like to be alive.

#4- Misery

Misery is a movie where a story writer who, after an accident, finds himself at the mercy of his self proclaimed fan. Trouble begins when she finds out he is about to kill off her favourite character.

It is an adaptation from a novel by Stephen King, in which he proves his genius and the ability to find horror in everyday situations.

#3- Requiem For a Dream

This movie is known to be a movie of extremes. From the camera tricks to the rush of the characters, all of it reaches down to the cellular level.

If you want to explore the power and magic of movies, this is the exact movie for you. It tells parallel stories linked by the various relationships magically evoking the inner landscape of human brain and feelings.

How happiness is gloriously found and tragically lost, it's all right there.

#2- Memento

What Peter Travers says about this movie should be considered here; 'Mushrooms wont help when it comes to Memento, the first film in the Sundance competition to go into wide release and my favorite among the sixteen dramas that vied for prizes.

A man looking to avenge his brutally murdered wife has also some issues of his own. The movie is genuinely perplexing and dark but its a treat to watch for thrill-lovers.

#1- Se7en

Who would not watch a movie with Brad Pitt and Morgan Freeman in it. And when it is known to be the bleakest films in the mainstream cinema history, obviously why not.

This movie is dark, disturbing and occasionally gory. It saves its shocking revelations for the final scenes. Movies like these are indeed, lethal. Checkout Se7en rating on IMDb.

For more infomation >> Top 10 Psychological Thrillers That Will Blow Your Mind - Duration: 6:47.

-------------------------------------------

Xing Zhaolin Sends Fans A Confession From Weibo @邢昭林: 送你们一个表白 - Duration: 0:38.

Look.

They are very strong right?

They came to this world

and have to face all the dangers alone.

Even if there are no parents taking lead,

they can also clearly find

where to go.

I like you

because you are similar to them.

You said I look a turtle?

A little different.

You have that one persistence

and a little more cute.

For more infomation >> Xing Zhaolin Sends Fans A Confession From Weibo @邢昭林: 送你们一个表白 - Duration: 0:38.

-------------------------------------------

'라스' 잘나가던 서민정, 다 포기후 남편과 미국행 이유 - Duration: 5:47.

For more infomation >> '라스' 잘나가던 서민정, 다 포기후 남편과 미국행 이유 - Duration: 5:47.

-------------------------------------------

The very first Celebrity Big Brother 2017 trailer is here and it's so glam! - Duration: 2:35.

The very first Celebrity Big Brother 2017 trailer is here and it's so glam!

Were less than one week away from the launch of Celebrity Big Brother, so its about time we got a proper trailer!.

Thankfully, Emma Willis brightened up our dreary post-Love Island lives on Wednesday (July 26) by dropping the very first glitzy CBB teaser ahead of next weeks all-star extravaganza.

Channel 5s teaser doesnt quite give away which celebrities will be taking part, but it does tout that Celebrity Big Brother will be this years hottest all-star summer retreat.

As ever, there are plenty of rumours swirling about which All Stars and New Stars may be moving in — with TOWIEs Bobby Norris, The Cheeky Girls, Union J star Jaymi Hensley and Ex on the Beach hellraiser Jemma Lucy among the newbies.

There are rumblings that Channel 5 will be bringing back some all-stars this series as well. Last summers champion Stephen Bear and his girlfriend Charlotte Crosby, Perez Hilton, Lauren Harries and even Ivanka Trump have all been tipped to make a comeback.

One star who we can probably safely count out is Sinitta, who recently said shed only do Celebrity Big Brother if producers agreed to an outrageous series of demands.

If I last more than halfway, I want my puppy to visit me, Sinitta told OK! Magazine last month. I want a swearing ban, because I dont swear and people shouldnt be allowed to swear at me or around me.

I asked for a bodyguard who would stand with me at all times, especially when Im asleep. If they provide alcohol, then I want tequila because its all I drink.

Celebrity Big Brother launches with a two-hour live special hosted by Emma Willis next Tuesday (August 1) from 9pm, followed at 1105pm by Rylan Clark-Neal with Big Brothers Bit on the Side.

But first, civilian Big Brother comes to an end this Friday night (July 28), also airing at 9pm on Channel 5.

For more infomation >> The very first Celebrity Big Brother 2017 trailer is here and it's so glam! - Duration: 2:35.

-------------------------------------------

'군함도', 개봉 첫날 97만명..역대 최고 오프닝 - Duration: 3:39.

For more infomation >> '군함도', 개봉 첫날 97만명..역대 최고 오프닝 - Duration: 3:39.

-------------------------------------------

Business Merchant Solutions - Duration: 1:03.

Business Merchant Solutions offer a range of payment options to suit your business.

They can help enhance a customer's experience with your business

by giving them more ways to pay. Bankwest can provide a range of options that

allow your customers to make payments on-the-go, in-store or online.

These include EFTPOS tablets with wireless connectivity, terminals that integrate

with your point-of-sale system, and the ability for your business to receive online payments.

You can choose a simple merchant plan with a flat monthly rate,

based on the volume of transactions your business processes, or we can tailor a

package to suit your business needs.

With everyday settlement into a Bankwest

transaction account, Business Merchant Solutions provide you with fast access

to your cash, allowing you to manage your cash flow.

To find out more, speak to a merchant specialist on 1800 488 588, or

visit bankwest.com.au/smallbusiness

For more infomation >> Business Merchant Solutions - Duration: 1:03.

-------------------------------------------

For more infomation >> Business Merchant Solutions - Duration: 1:03.

-------------------------------------------

Home Bike Shop Update - Garage door art! - Duration: 6:24.

This morning I'm running an errand.

This print job wasn't cheap, but it was worth it.

Collectively, these signs will form a mural on my garage door.

The artwork was designed by Sketchytrails, or Kristina.

Between her, the printer, and myself, we needed to get the sizing and spacing just right to

fit in these cutouts.

Between the weight of the insulation and the mural, my garage door is going to need heavier

springs.

The mural is dedicated to my three main sponsors, Diamondback, Box, and of course my Patrons.

In June they chose a Taco bike for their logo.

Next year my Patrons will choose something else, and we'll update the mural with a

new panel.

This piece was designed to look like an extension of the shop, as if we're standing on this

cliff overlooking the Blue Ridge Mountains.

With this mural complete, it's time for me to show you how the shop has changed.

Back in the spring, we built this workshop with pretty basic tools and supplies.

From the start I installed a bench grinder, and a shitty vice.

You guys wanted me to get a refrigerator, but I decided against it on account of the

noise and heat.

I did get a speaker system though, and an air compressor.

For all of you who requested a flat screen tv, I got something better.

This projector is for live streaming.

With a 90 inch projection, I can read your comments from across the shop while working

on bikes.

Of course the lights need to be dimmed to make it visible, but that's what I get for

using an $85 Amazon Projector.

Maybe we'll upgrade this in the future.

The foam floor has been holding up great, and it's easy to keep clean too.

As long as it's dry, this blower makes quick work of leaves, dust, and dried up mud from

rides.

I use it every day.

When the shop is clean it feels just like another room in the house.

Of course, with such a huge door the shop seems to accumulate bugs.

I found a solution for that too.

You can throw shop towels at them but there are just too many.

While bug zappers are next to useless outdoors, this one works like magic.

With all the lights off and the door closed, this place is a ghost town by morning.

This ladder has also become a tool I use every day.

For that reason, it lives right next to the work bench on this hook, ready for action

on a moment's notice.

Since the original build I added a lot of things out of necessity.

This second bike rack will be great for guest parking, and these shelves will hide anything

I don't want laying out in the shop.

I even use this box to organize my spare hardware, with dedicated containers for machine screws,

chain, lag bolts, and rubber.

Eventually I'll need something bigger.

Most shops have dedicated sticker space.

This metal cabinet also stores my gear, from helmets to camera batteries.

Speaking of which, we built this charging case during a livestream.

It opens up to reveal a plug, which powers this usb hub.

This can charge all of my cameras and batteries at once, in the shop or on the road.

While I do keep most of my non bike tools tucked away, the left side of the pegboard

holds the stuff I use most, like sockets, cordless power tools, and drill bits.

While the bins under the pegboard have proven useful, I'm already starting to outgrow

them.

Most shops are a work in progress.

My home bike shop has been dubbed the hackshack by my subscribers.

It's a set for this channel, but also a very functional workspace for everything from

hacks to legitimate bike repairs.

I hope you found this shop update entertaining.

Before you ask where I got something in the shop, check the description for links.

There's also a link to the original build video from the spring.

Let me know what you think, and tell me about your shop below, even if it's the corner

of your living room or trunk of your car.

Now that my shop is finally done, we can get back to Berm Creek.

Thanks for riding with me today, and I'll see you next time.

For more infomation >> Home Bike Shop Update - Garage door art! - Duration: 6:24.

-------------------------------------------

20 Tips How to organize your Refrigerator - Duration: 10:03.

20 Tips to Organize Your Refrigerator.

If you keep your refrigerator neat and well

organized, it will tell on the quality if how your food turns out.

Most homes, can't even remember the food we have stored in the refrigerator because

everything is packed messily.

The food later gets rotten, and we throw it away.

Keep your refrigerator organized and you will have a minimal waste of food.

Here are 20 tips to help you with that:

20.

Classify the Types of Food. Classifying all the food, you keep in your

refrigerator is going to make it easier to reach them when you want to eat them.

It will also make the refrigerator look tidy and pleasant to anyone that opens the door.

Depending how spacious of your refrigerator is, you can use small baskets or bowls to

classify the food.

Use small plastic plates if your fridge is on the smaller side.

19.

Store Seasonal Greens in Jars. Store your salads inside jars to keep them

fresh.

The jars will not only keep them fresh but will also make the fridge look organized.

Use jars and not plastics to store your salads so that the vegetables can get some space.

Remember to sprinkle some water in the jar to make the salad stay fresh.

Create a weekly schedule to drain the water and replace it a few times so that the salads

do not go sour.

Keep your salad jars on the side of the fridge.

18.

Use Egg Holders. Most refrigerators already come with pre-installed

egg holders.

But many people do not know how to use the egg holders in the right manner.

When eggs are all over the wrong place, it makes the refrigerator look untidy.

Fix in one more egg holder if you have to, to keep all your eggs away from other things

in the refrigerator.

Arrange the eggs properly in the egg holders go prevent them from getting cracked, especially

when there are many things in the refrigerator.

17.

Defrost the Fridge! It is very important to keep an eye on the

freezer in your refrigerator.

You may need to defrost the refrigerator regularly to prevent an accumulation of ice in the freezer.

If you allow ice to accumulate inside, it may be difficult to thaw out.

A buildup of ice will also keep dirt inside your fridge.

Turn off the fridge to make the defrosting process easier.

16.

Use Binder Clips for Bagged Goods. You should keep all leftover food in the refrigerator

so that they won't have to spoil.

You can use your binder clips to store things in a bag and keep in the refrigerator.

Attach the binder clips on the space and opening of the bag.

Keep the food at the bottom of the shelves.

It is guaranteed to last longer with the bags secured.

15.

Clean Your Fridge! When you have stocked all the food you want

inside your fridge, it has to look good and smell good always.

The only way this can happen is if the fridge is clean and free from microorganisms.

Keep your fridge hygienic on the inside and outside.

There are existing products like rosemary and lemon to help you with that,

though you may have to choose to make your own products.

Whichever one works for you.

14.

Use Magazine Holders. If your fridge is spacious, you can try using

magazine holders to keep things organized.

You can store any type of food in a magazine holder.

Put as much food as each holder can hold, cover, and then label the body.

This way, you don't have to forget what you have in each one.

Magazine holders look better when arranged vertically.

Arrange them tidily inside the fridge.

13.

Label the Side Doors! Labeling is very effective in keeping things

organized in the refrigerator.

You can use labels on the door as well if you keep food there.

Most refrigerator doors can hold any kind of food package from jars, to bottles, to

cans.

Label your spices, seasoning, ketchup, and sauce accordingly and arrange them on the

door.

12.

Make Expiration Date. This is for non-packaged foods like eggs and

vegetables that have no producer suggested expiry date.

Write your own expiry date on them so that they don't go stale before you realize it.

It is possible for you to forget to eat foods that come with expiry dates on the pack.

You can remind yourself by rewriting them boldly.

You should be conscious of the freshness of your food to minimize wastage.

Know what you have in the fridge and when they get bad.

11.

Use Magnetic Tins. If you like having magnetic materials on the

door of your fridge, then it would also be a good idea to have magnets in your food jars

or cans.

The food holders must be magnetic for this to work.

You can put magnets under your snack box and turn it horizontally to give you easy access

to the snacks.

10.

Plastic Wraps for Meat. It is unhygienic to store meat directly in

the fridge without using any covering or layer.

Always use plastic wraps over your meat before putting them in the fridge.

The plastic wraps will also keep the meat from messing up other food.

It is always helpful to attach a label on the meat you have in the fridge for easy identification.

Keep your meat sterile always.

9.

Maximize the Bottom Shelf! Most refrigerators come with two or more shelves,

so it is in your best interest to maximize all of the space available in yours.

The bottom shelf is ideal for keeping fruits and raw meat.

If you have any leftovers from these, it is best you keep them on the bottom shelf so

that they don't to waste.

Fruits, vegetables, and meat tend to go bad once they are half eaten quickly.

Dedicate a separate space on the bottom shelf for the half-eaten food so that they won't

get mixed up with the new food.

8.

Keep Milk Out of the Door! Still, on the things that you can do with your

door, here is something you shouldn't do; storing milk on the side of the door.

Because you will be opening the door of your fridge often, the temperature there will keep

changing constantly, and the milk will quickly go bad.

Milk in every kind of package should be stored inside the main compartment to prevent wastage.

7.

Maximize your Fridge Wall. If all the space in your fridge has been occupied

and you still have things to store, you can use the walls.

But you have to find something that can hold the food to the wall.

The food has to be light, as well as the holder.

A small basket or bucket will be fine.

6.

Label Your Foods! This is almost similar to the one before.

When you have all your food classified and arranged in their proper places, it would

also be helpful to label all the food you are going to eat soon.

Putting a label on them will help you decide what you will eat first so that you

can make space for your other foods.

Be certain to label opened and half eaten cans and put them aside so that other foods

can go in.

5.

Line the Shelves! Use plastic wraps or films to cover the shelves

so that it will be easier for you to clean out your fridge.

When the coverings get messed, you only have to remove and throw them away.

Patiently take out everything that you have in the fridge first before laying the covering.

Choose coverings that are attractive but also sticky, to make it tidier.

4.

Remove any Unnecessary Shelves. There is no need to keep shelves that you

won't have much use for inside the fridge.

If you remove them, you will end up with more space to store your food and products.

Remove all unnecessary shelves and rearrange your food well in the extra space.

3.

Use Bottle Opener. Your organization should not exclude the outside

of your fridge.

If yours looks plain, you can pimp it up a little by placing a bottle opener somewhere

on it.

You may also add a few colorful magnets of varying shapes and sizes if you like.

Just do something with all the blank areas of the door of your fridge.

Placing a bottle opener on your fridge will also make it more convenient to open bottles

without sacrificing your teeth or hands.

2.

Use Dry Erase Marker.

Use dry erase marker to write all the things

relating to your fridge that you intend to do or have already done.

Ensure that you do not use a permanent marker so that you can always erase the writings

and not causing a mess on the surface of your fridge.

This is a great idea to help you not forget your groceries and to-do lists.

and last No.1

Take a Photo of Your Fridge. This last step should not be taken any less

seriously than the others even though it is this simple.

As a matter of fact, this ordinary action can turn out to be the most important thing.

When you are going grocery , make it a habit of taking a photo of the the things you already

have in your fridge.

When you get to the store, check the photo carefully before you buy anything so that

you won't end up with things you already have.

Keep the fridge wide open so that you can get a full capture.

Take photos from various angles so that you don't miss anything.

Then capture all the shelves individually from those for meat and veggies to those on

the door of the fridge.

Done, If you enjoy our list, press the like or share

button under this video... or better yet comment it with your wisdom

and suggestion.

Lastly, press the subscribe button if this channel is new to you.

see you again later for more lists.

Thanks for watching.

For more infomation >> 20 Tips How to organize your Refrigerator - Duration: 10:03.

-------------------------------------------

MINE - MiNECRAFT PaRoDy Of "PiMP" by 50 Cent - Duration: 3:59.

I don't know what you heard about me But a witch can't get a hitpoint out of

me No diamonds, no spells, you can't see

Because I know how to M-I-N-E I don't know what you heard about me

But a witch can't get a hitpoint out of me

No diamonds, no spells, you can't see Because I know how to M-I-N-E

Now Steve, he in the cave, he mining for diamonds He got a thing for that emrald, that redstone,

that Iron That GOLD, pickaxe, never stop mining

In the cave he has fantasies, he wants diamonds shining

I hit it with the pic, my inventory's a mess

An hour later, have that iron stack up in my chest

Them trick minerz in my face thinking they the best

I got the pic in the cave trying to get a diamond out her

I like this pic, I like this cave, I like the ores it's got

I'm from the village, think i like mining all this bedrock

I ain't that miner looking for stone thats red

I'm that miner tryna to get some sleep in a bed

I could care less where my diamonds go when I'm gone and ded

Like Steve I, hit that track, catch a date, and come and pay the kid

Look baby without torches, you can't see You playing with me, you walking in a M-I-N-E

I don't know what you heard about me But a witch can't get a hitpoint out of

me No diamonds, no spells, you can't see

Because I know how to M-I-N-E I don't know what you heard about

me But a witch can't get a hitpoint out of

me No diamonds, no spells, you can't see

Because I know how to M-I-N-E I'm bout my diamonds you see, girl you can

mine with me If you looking for me, I'm in a M-I-N-E

Not what you see on TV, none of these ores come easy

chest full of blocks, straight from the M-I-N-E Come get diamonds with me if you curious to

see How it feels to be in a M-I-N-E

Roll in the cart with me, we could play PVP From the backseat of my (silent), I'm gonna

M-I-N-E Girl, we could mine some diamonds and we could

have a ball We could toast to the good life, girl, we

could have it all We could really splurge, girl, and tear up

the mall If ever you needed someone I'm the one you

should call If we were on a cliff I'll make sure u never

fall If you got problems I can solve 'em, they

big or they small That other miner you be with is about to quit

I'm your friend, your miner, and defender, Bi...

I don't know what you heard about m

But a witch can't get a hitpoint out of me

No diamonds, no spells, you can't see Because I know how to M-I-N-E

I don't know what you heard about me But a witch can't get a hitpoint out of

me No diamonds, no spells, you can't see

Because I know how to M-I-N-E I told you fools before, I beat up the fools

I keep a cart, some pics, and some toolz I mine some iron then take it to the furnace

to be fused She got on Payless; me?

I got on enchanted shoes I'm shopping for chest plates in the summer,

they cheaper Man, this how you can have it, when I'm done

I ain't gon' keep it Man, ocelots come and go, every miner pimping

know You saying it's secret, but you ain't gotta

keep it on the low Wolf, mine with me, I'll have you eating bones

in the street Put my other diamond hoes down, I feed your

___ beet Now Niki my bottom miner, she always come

up with my bread The last miner she was with put stitches in

her bed Get your ho's out of pocket, I'll put a

charge on a witch Cause I need 4 minecarts full of diamonds

by six Hos make a miner rich, I ain't paying for

tricks Catch a date, enchant a chestplate, real quick

I don't know what you heard about me But a witch can't get a hitpoint out of

me No diamonds, no spells, you can't see

Because I know how to M-I-N-E I don't know what you heard about me

But a witch can't get a hitpoint out of me

No diamonds, no spells, you can't see Because I know how to M-I-N-E

For more infomation >> MINE - MiNECRAFT PaRoDy Of "PiMP" by 50 Cent - Duration: 3:59.

-------------------------------------------

How NOT To Paint A Telescope - Duration: 15:16.

hey YouTube today I want to talk to you

about the LX 50 deforking and

modernization restoration project I've

decided to take on in the last video I

went ahead and deforked my telescope and

said that I was going to put some

dovetails on here in preparing to do the

dovetails I had to remove a set of

screws from the telescope here and here

and some of these screws were so rough

that they had siezed to the tube and I

had to drill them out to avoid getting

filings into the telescope that would

scratch up my optics I had remove the

optics so I went ahead and did that

pulled the screws out with the drill and a

tap and decided since I'm this far let's

go ahead and repaint and flock the

inside so I set out to do the paint job

I stripped all the paint off I primed it

with primer gray hit it with a flat

black because that I'm supposed to use

for this color shifting blue that we

decided to go with and it turned out

looking like shit as you can tell it's

kind of scuffed up it's a little hazy

there's a slight color shift to it and

the biggest annoyance of it all are

these black lines these black lines are

where none of the color shifting paint

stuck to the black primer and the reason

why it wasn't going to stick was even

though I tried to spray at the coldest

part of the day it was still 85 degrees

and the paint dried between the can and

the tube and I had to spray from just a

few inches away to get anything to stick

and that didn't give me a broad coat

uh a broad spray and it was incredibly narrow

so I ended up with these uneven spray

lines and I did my best to minimize them

but as you can see they're still there

and it just doesn't look right so what

I'm going to do is admit defeat I

don't know what I'm doing and I'm going

to take this any get it done

professionally and I'm hoping it's going

to turn out really cool what I did do

however and I

as well is I got a lot of video of how I

went from the original Meade blue to this

point and so what I want to do is show

those of you who are thinking about

taking our project like this but haven't

done it before what it took to get to

this point and I'm sure 90% of you 95%

of you out there have better paint skills

than I do I'm terrible at it

if you can do better paint jobs than I

can then I'm sure that you'll be able to

do a telescope that just looks beautiful

I suck my paint job sucks my telescope

looks like crap so why don't I show you

how I went from the Meade original blue

down to the bare metal and then built it

back up with the primer the black base

coat and in the color shifting paint and

what it took me to get to this stage

first off I needed to remove the paint

from the telescope tube to do this

I used a pretty strong paint remover

what I didn't realize when I was using

this at first is that in direct sunlight

on a black telescope or dark blue

telescope like my Meade is the spirits

inside of the paint stripper actually

boil away which you can see going on

right here now I did my best to kind of

spread it around so it could work at the

time I didn't realize I was kind of

defeating myself the more I spread it

around the faster that the volatile

chemicals inside of the paint thinner

would evaporate and the less time it was

actually effectively able to work and as

I began to try and scour it down through

the paint it just peeled off kind of

like a rubber cement or rubber

would and none of the paint ever

actually came off so after I got wise to

what was happening to the Sun I moved

into my garage and allowed the telescope

to kind of cool down before I tried

again this time I waited and saw that

the paint never actually boiled away so

I was able to spread it around over a

larger area and get it to react with the

paint a little bit unfortunately it was

not very reactive to this kind of paint

and it took an awful lot of scrubbing

just to get a little bit to flake off

but eventually I was able to get down to

some bare metal all in all it's taken me

about an hour just to get to this point

but I was about to have a little bit of

a breakthrough it turns out that this

paint really wasn't paint at all this

telescope had been powder coated and my

paint stripper did soften it up enough

to where I could get under and peel it

off and it peeled away almost like a

latex balloon or heat shrink wrap that

was shrank over the telescope tube so I

set about running paint thinner all over

the telescope tube letting it sit for

about 10 minutes and then peel away what

I could and this went on for about three

hours once I had to paint removed

I needed to fill the original screw

holes leftover from the deforking

process I used automotive body filler to

do this and an index card just to kinda

scrape it smooth with the surface once

filled I then went ahead and grabbed

some 100 grit sandpaper and attempted to

sand down all the remaining specks of

paint that the paint remover could not

get off

there were about a dozen or so spots all

over the tube and some of them were a

bitch to stand down I ended up actually

having to stand them flush with the

metal rather than just sand them off which

is what I was kind of hoping to do the

majority of the spots that I would had

to work on were around the rim now I'm

doing some priming on the optical tube

primer was needed for the paint that I

was going to put on as it was not a

primer and first coat all in one so I

opted for a sandable gray primer that I

could spray all over the tube to kind of

fill in some of the scratches that were

left over for my sanding of the paint

flecks also I was hoping it could kind

of fill in any of the unevenness from

the body filler I put in to the two

screw hole next I needed a better way to

paint putting it on a lazy susan just

wasn't working

I decided I could create a horizontal

roller by using a couple of wheels

screwed into two-by-fours like this I

picked these up at the Home Depot they

were only about 2 bucks each

I used leftover decking screws from when

I built the observatory deck to secure

these to a few spare two-by-fours

leftover also from other construction

projects we've had around the house with

the roller assembly done I was able to

mount the telescope tube to the rollers

and it worked out pretty well once I

actually got the wheels onto the black

metal part and not the piece that I was

trying to paint I could just roll it

around like this and I was able to then

paint left to right instead up and

down after doing a second priming I went

ahead

sanded it down to get rid of any orange

peel in the primer this is it after I

was done sanding for some reason the

video did not record when I was trying

to do the sanding so you can see what it

took it's glossy because it's still wet

from the wet sanding after I had

everything wet sanded and dried I went

ahead and removed the old plastic

masking that I had taped on it was

beginning to peel away from all the

moisture that was in there

and it was becoming a problem and I was

afraid that's a black paint and the

color shift paint would eventually get

into the places I didn't want it to so I

swapped out the old masking for some new

masking after the old masking was

removed I put on a pair of latex gloves

and wash them off to make sure there

wasn't any oil on them and then I went

ahead and used a few drops of dish soap

and warm soapy water to spray down the

optical tube and get any remaining dust

and finger oils left over from the

previous sanding I didn't want any of

this stuff to contaminate the black

paint job that I was about to put on

once I wiped it down with a towel to

kind of dry off any of the soapy water I

then hit it with just regular hose tap

water to get any remaining soapy residue

off the tube again I didn't want to need

that soapy residue to interfere with the

next color of black just to make sure it

dried fast and not to allow any moisture

to soak into the primer I went ahead and

towled it off with a few shop towels just

to make sure that the moisture would

stay on there then I moved it out to an

area where I can get a little bit better

visibility my garage was a little dark

and opted for the deck of my observatory

to re mask the optical tube now it was

about 9:30 or 10 o'clock in the morning

and it was already hot you can see sweat

dripping down my arm from in type to

those latex gloves there's also a bit

windy although on a hot Texas summer day

the wind is more like a hair dryer it

doesn't really do anything to make it

more comfortable it's a major hindrance

and it kept blowing this new masking

paper I was trying out everywhere and it

was a real bitch to get taped to the

optical tube but eventually I was able

to get a grip with the new tape and

secure it to the optical tube and tape

around this frog tape I have it

actually does not stick very well to the

Scotch blue painters tape nor does it

want to tear very easily if you're doing

this with latex gloves like I am doing

and you're already using some other form

of painters tape stick with whatever

painters tape you've got don't try this

frog tape it doesn't like it so what the

back of the optical tube assembly taped

up it's time to tape the front of the

tube and this time I got a little wise

and decided to just roll the tube along

the deck and allow the wind to maybe

push the paper into the telescope

instead of trying to blow it off of the

telescope this seemed to work a little

bit better

it took me about 20 minutes to tape the

top of the telescope tube this part only

took me about five minutes to do with

the masking all taped off I went ahead

and got the new black base coat applied

I was using a color shift paint from

rust-oleum and the color shift paint from

rust-oleum requires that I use a black

base coat I opted to go with a

semi-gloss based codes hoping that the

semi-gloss would allow for a better

color shift the rust-oleum did say that

I could just use black primer which is

it really gloss at all but I figured if

it's going to shine through to the black

and then be reflected off of that

a semi-gloss would give a more dramatic

effect I applied probably two or three

coats of the black paint it's kind of

hard to tell exactly how many coats I

put on because I would rotate the

telescope around sometimes two or three

times during a single coat and I was

going so light I don't know if it

actually counted as the single coat or

maybe two coats in one application

however for this last application I was

going for a little bit more of the gloss

coat and so I did spray it on a little

thicker and I took my time applying it

making it a little more wet and I

sprayed it on and I do think that this

really did help give it a good black

color with this final coat of black

paint added I then allowed it to dry

overnight and then I quickly sanded it

down just to remove any of the dry

overspray that had cured to the tube

biggest problem I had when applying the

color shift paint with how fast it dried

I was running into a few compounding

issues one was the paint would dry so

fast it wouldn't actually even adhere to

the telescope it would dry in midair the

second problem was that dry overspray

would land back on the tube as I was

spraying and get caught in anything that

was still wet the result was a milky

appearance of anything that did stick

and dried to the tube and I do believe

that this was a contributing factor

among my own stupidity and mistakes that

led to the black stripes being all over

the telescope also the white milky

looking appearance was the result of

tiny air bubbles trapped in the paint

and it dried I did my best to stand them

out and clean the tube up the best I

could

the reason the telescope looks so shiny

and actually has that purple color shift

here is because I had already been

sanding it for about three hours

it started at 320 grit sandpaper and

sanded for about an hour or two and then

eventually worked my way to 400 and

ultimately 600 grit sandpaper trying to

smooth this out eventually I had had

enough

and decided to call this telescope

project a lost cause with the help of a

local powder coater I'm going to be able

to get the color shift that I want by

using professional help I hope you have

enjoyed my little journey and if you've

liked what I've done here or any of the

other videos I've done please go ahead

and subscribe to my channel and give

this video a like as always clear skies

and keep looking up

For more infomation >> How NOT To Paint A Telescope - Duration: 15:16.

-------------------------------------------

【キッズ・kids】はじまるよはじまるよ手遊び♪ビーチでスイカが大爆発!?Japanese play will begin [I will begin] - Duration: 3:42.

It begins Once Tsu by starting

It begins Once Tsu by starting

Ninja's Delon at 1 and 1

It begins Once Tsu by starting

It begins Once Tsu by starting

'm crab's in 2 and 2 snip

It begins Once Tsu by starting

It begins Once Tsu by starting

3 and 3 a ne this beard meow

It begins Once Tsu by starting

It begins Once Tsu by starting

4 and 4 a was this leg whining

It begins Once Tsu by starting

It begins Once Tsu by starting

At 5 and 5 Turin I Patapatapata ~

Không có nhận xét nào:

Đăng nhận xét